If your WooCommerce website is already fully set up and professionally designed, the most important task is adding products correctly. Proper product setup improves customer trust, boosts search engine rankings, and increases sales.
This complete beginner-friendly guide explains everything step by step. After reading this article, you will be able to add products to your WooCommerce store confidently without needing help from anyone.
What Is WooCommerce and Why Is Product Setup Important?
WooCommerce is an eCommerce system for Website that allows you to sell physical and digital products online. Correct product setup is essential because it directly affects how customers view your products, how search engines rank your pages, and how smoothly orders are placed.
A properly added WooCommerce product includes a clear title, detailed description, short description, correct category, pricing, stock information, and high-quality images.
Quick Steps to Add a Product in WooCommerce
- Log in to the WordPress dashboard
- Go to Products → Add New
- Enter product name
- Write detailed product description
- Set price and inventory
- Add short description
- Create or select category
- Upload product images
- Publish the product
Before You Start
- Your WordPress website is live
- WooCommerce is already configured
- Website design and layout are complete
This guide focuses only on adding and managing products.
Step 1: Log in to WordPress Dashboard
Go to your WordPress admin login page and enter your credentials.
Example: https://yourwebsite.com/wp-admin
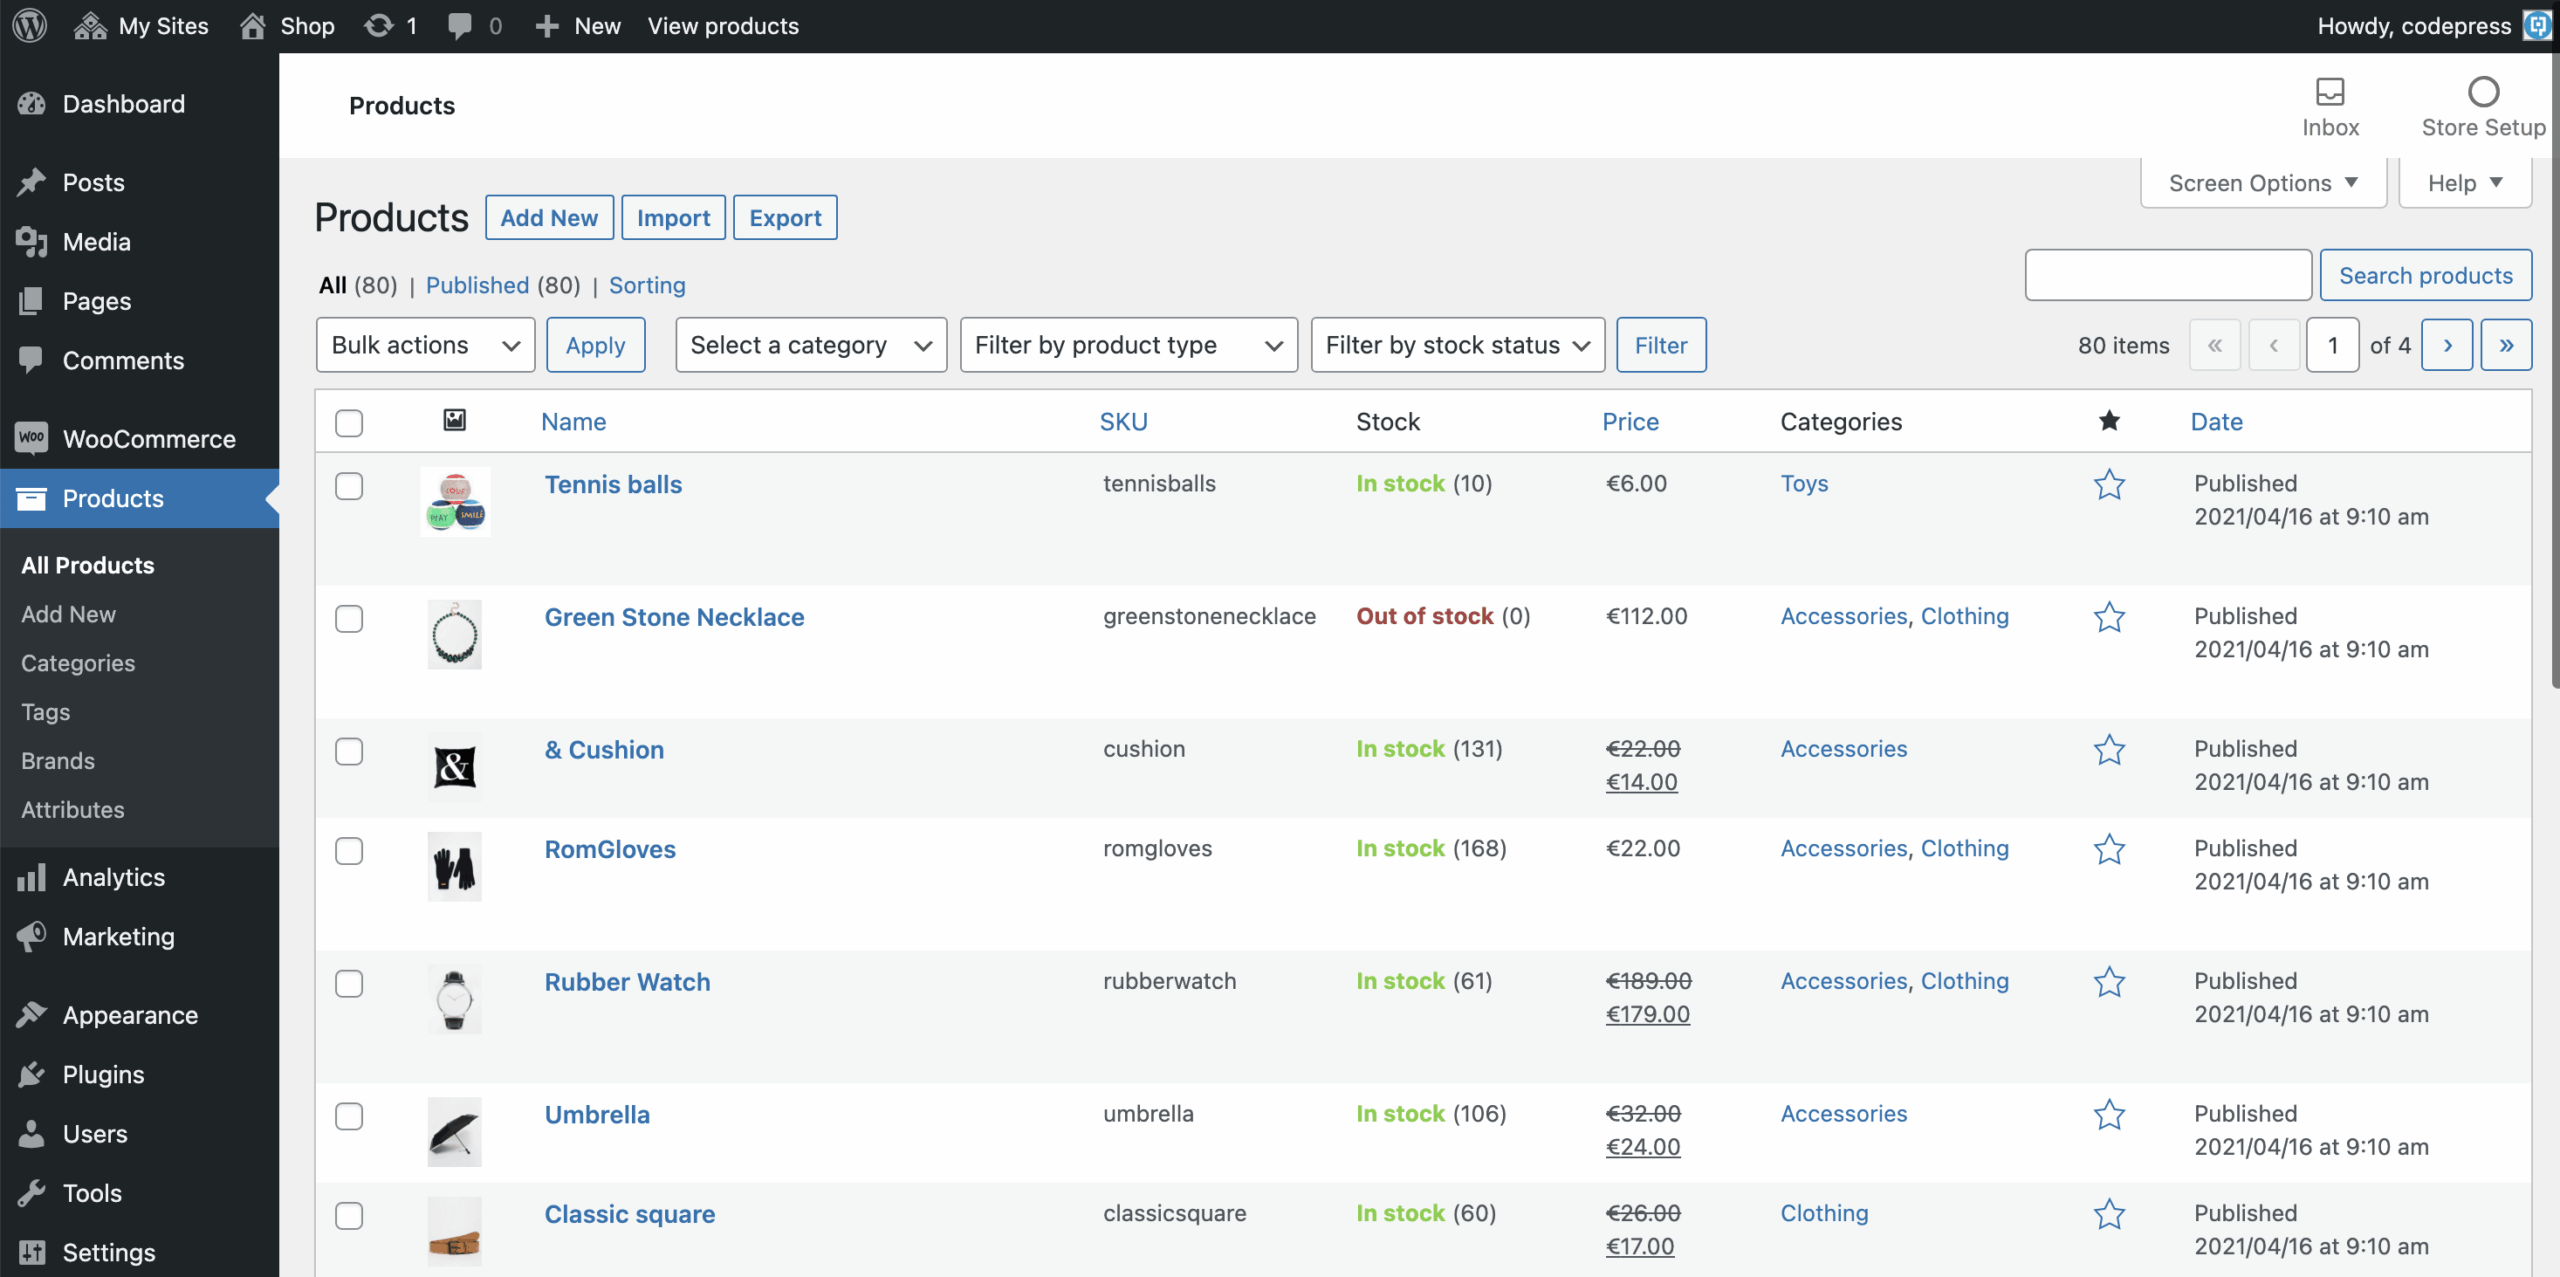
Step 2: Go to Products → Add New
- From the left menu, click Products
- Click Add New
You will now see the product creation screen.
Step 3: Enter the Product Name
Enter a clear and descriptive product name at the top.
Good Example: Premium Wooden Dining Table – 6 Seater
Poor Example: Table 01
A strong product title improves SEO and customer trust.
Step 4: Write the Product Description (Detailed Description)
The large editor area is the Product Description.
Product Description: The main content area that explains the product in detail and helps customers make buying decisions.
What to Include
- Product overview
- Features and benefits
- Material, size, color, or specifications
- Usage instructions
- Who the product is suitable for
Use simple language, short paragraphs, and bullet points.
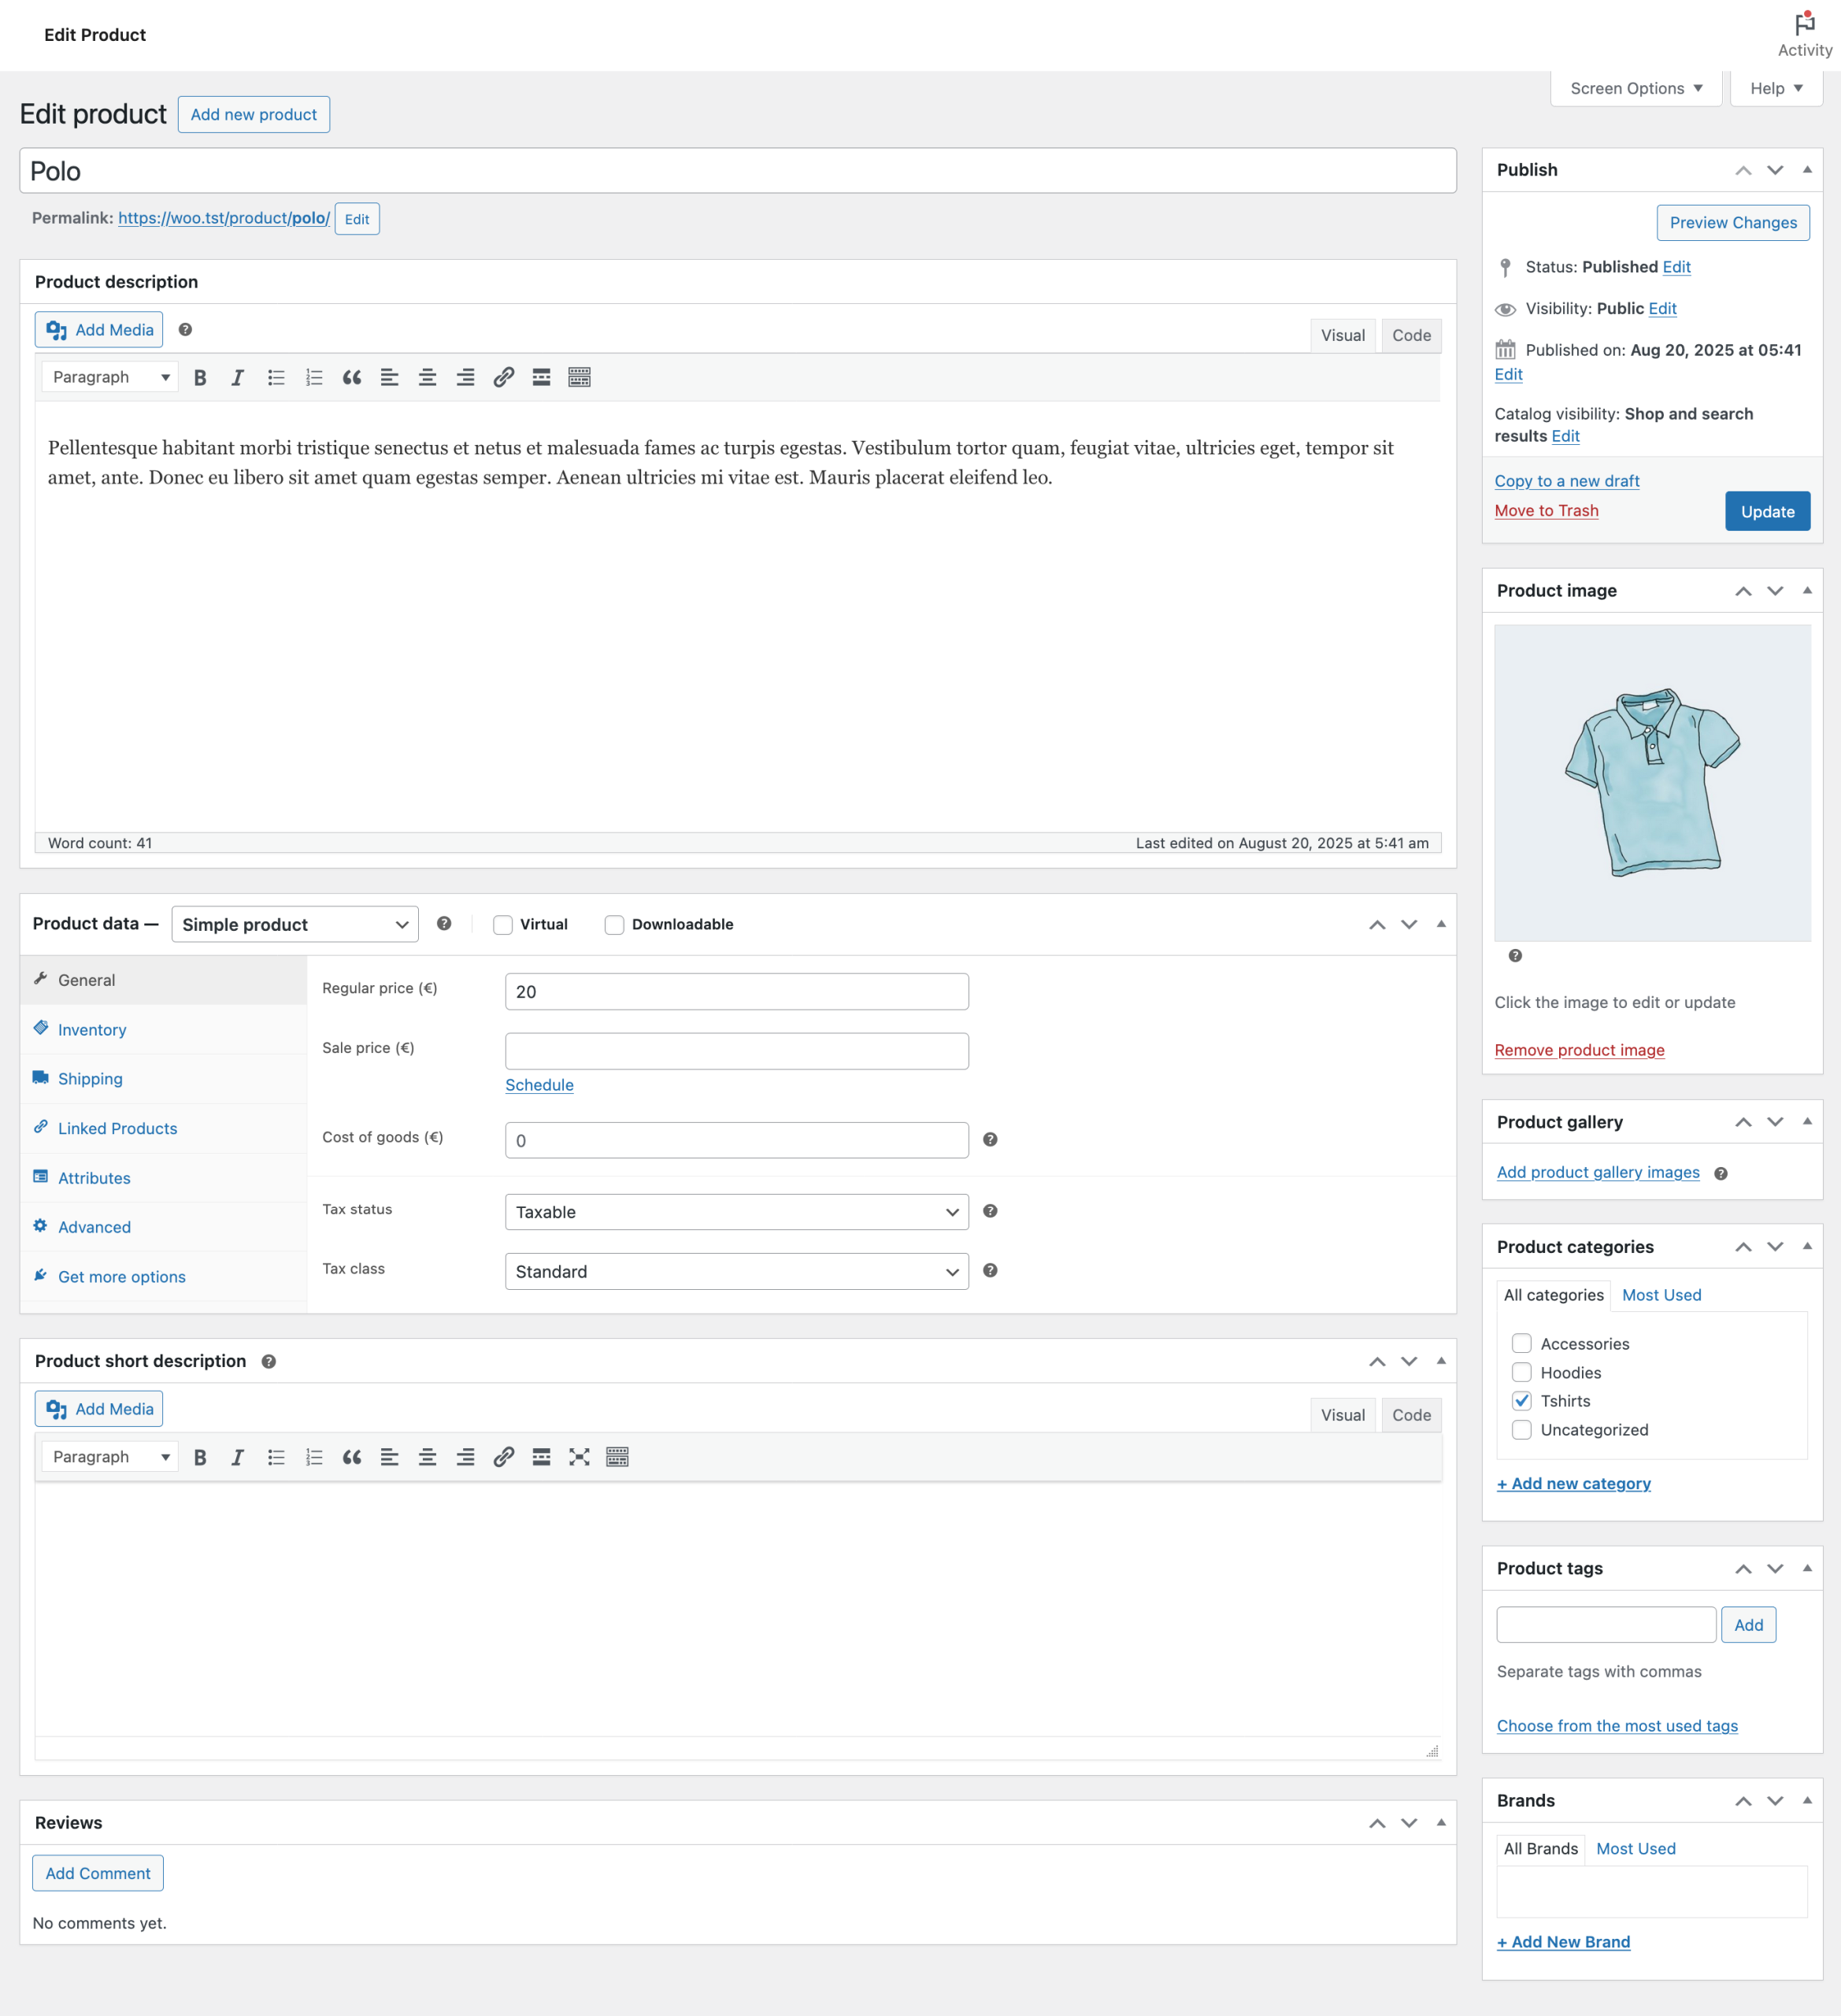
Step 5: Configure Product Data
5.1 Select Product Type
- Simple Product: Single product with no variations
- Variable Product: Product with size, color, or other options
5.2 Pricing (General Tab)
- Regular Price: Original selling price
- Sale Price: Discounted price (optional)
5.3 Inventory
- Enable stock management if required
- Set stock quantity
- Select stock status
5.4 Shipping
- Product weight
- Product dimensions
5.5 Linked Products
- Upsells (higher-value products)
- Cross-sells (related products)
5.6 Attributes
Attributes define details like size, color, brand, or material.
Step 6: Add Product Short Description
Product Short Description: A brief summary shown near the product price that highlights key features.
What to Include
- Main highlights
- Top benefits
- Quick summary
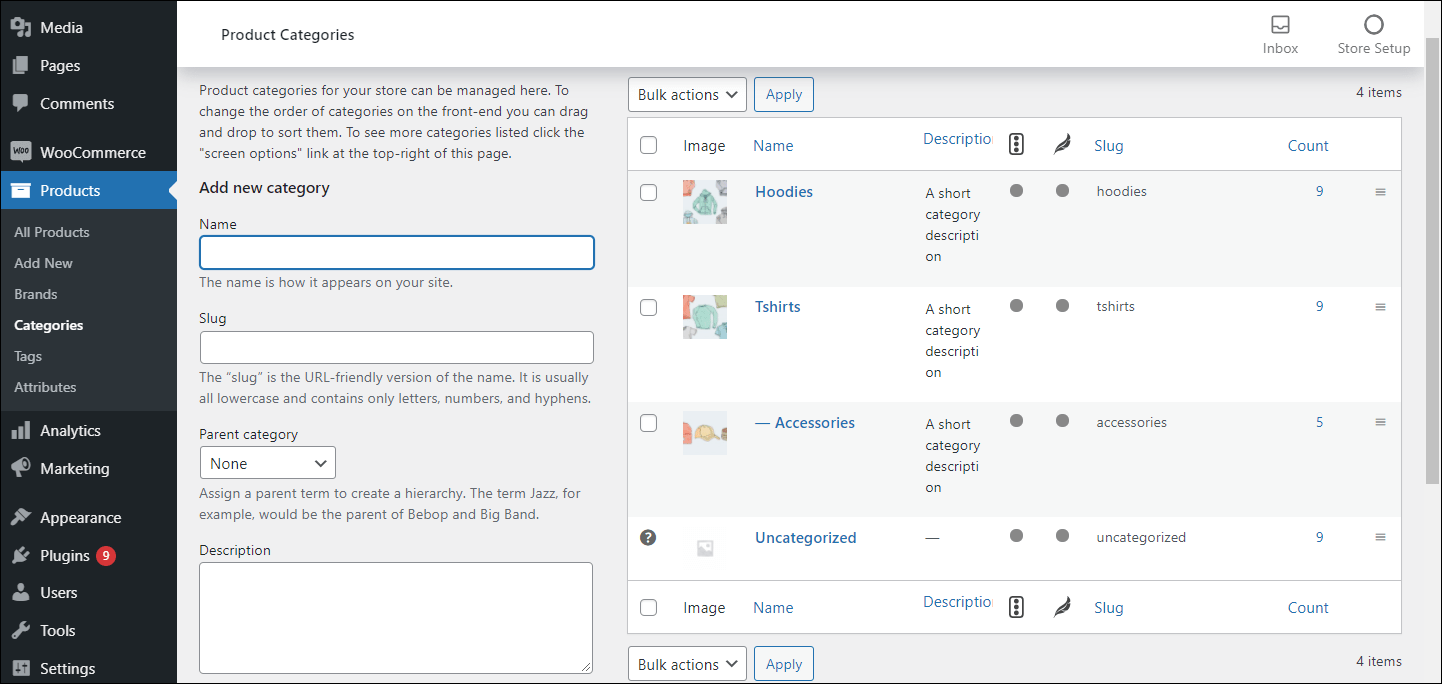
Step 7: Create and Assign Product Categories
How to Add a Category
- Click Add new category
- Enter category name
- Select parent category (optional)
- Click Add new category
Why Product Categories Are Important
- Improve website navigation
- Help customers find products easily
- Boost SEO rankings
- Keep your store organized
Step 8: Add Product Featured Image
- Click Set product image
- Upload or select image
- Click Set product image
Image Best Practices
- High resolution
- Clean background
- Clear product visibility
Step 9: Add Product Gallery Images
- Different angles
- Close-up details
- Product in use
Multiple images increase trust and conversions.
Step 10: Add Product Tags (Optional)
Tags are keywords that help describe your product.
Examples: wooden table, dining furniture, home decor
Step 11: Review All Product Details
- Title and descriptions
- Price and stock
- Images and category
Step 12: Publish the Product
Click Publish. Your product is now live on your WooCommerce store.
Need Professional Help with WooCommerce Product Upload?
If you followed all the steps above and still feel unsure, or simply don’t have the time to add products properly, hiring a professional is the smartest option.
Markety Monk offers complete WooCommerce product management services. From adding products, categories, images, pricing, and SEO-ready descriptions — everything is handled professionally so you can focus on growing your business.
Whether you want to add a few products or upload hundreds of products in bulk, our experts ensure accuracy, consistency, and a professional store appearance.
📞 Call or WhatsApp Markety Monk today and let professionals do it for you — quickly, correctly, and stress-free.
+91 79705 88863
Frequently Asked Questions (FAQs)
How do I add a product in WooCommerce for the first time?
Log in to WordPress, go to Products → Add New, enter product details, set price, add images, assign a category, and publish.
Why are product categories important in WooCommerce?
Categories help organize products, improve navigation, and boost SEO visibility.
What is the difference between product description and short description?
The product description explains the product in detail, while the short description is a brief summary shown near the price.
How many images should I add for a WooCommerce product?
Add at least one featured image and 3–5 gallery images.
Can I edit a WooCommerce product after publishing?
Yes, you can edit price, description, images, stock, and categories anytime.
Final Tips
- Never skip categories or images
- Write clear and honest descriptions
- Always review products as a customer
By following this step-by-step WooCommerce product guide, you can manage your store professionally and independently.